This knowledgebase article aims to show a novice how to configure an FTP client, and how to upload files to your webspace using FTP.
The first step is to understand what FTP actually does.
FTP stands for "File Transfer Protocol" and is a means of moving files from one location to another, in this instance, the files will be moved between your computer, and your webspace.
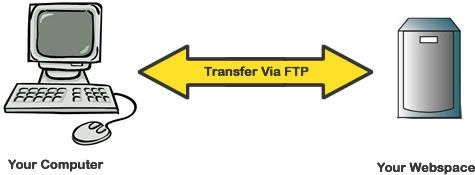
The first thing we need to do is download an "FTP Client". This is an application that will allow you to connect to your webspace, and transfer files between your computer, and the webspace.
In this example I will be using Filezilla, as it's a popular free FTP client, but don't worry if you are looking to use a different FTP client, the theory is all the same, so although the layout may vary slightly from client to client, the basic principles remain the same.
So if you haven't already downloaded an FTP client, please download Filezilla from the location below.
FileZilla Download Link
When you have downloaded Filezilla, please run the installer to install Filezilla on your computer. Once the install has completed, open up Filezilla and you'll see a screen similar to the one below.
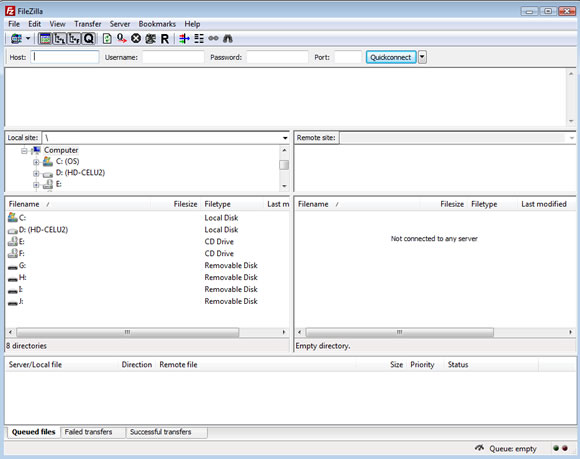
The first thing we need to do is connect to the server (your webspace). To do this we will make a Site Manager entry, this will mean only having to enter the connection details once, rather than having to enter them each time we need to connect.
To do this, click on File > Site Manager, or Press CTRL + S on your keyboard. You will then see a screen as shown below.
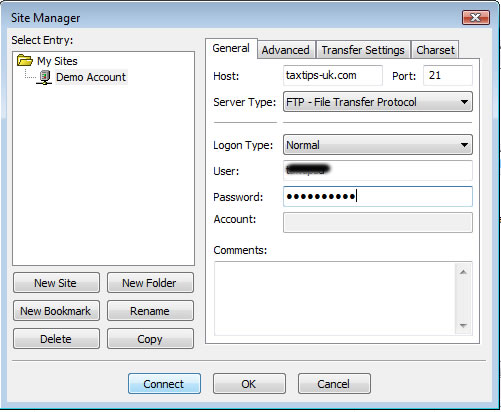
Click on "New Site"m give the site a name (Demo Account in the example above) and then enter your connection details as shown in the image above. If you are unsure of your FTP connection settings, please check your welcome email. You can also find your FTP username and password inside your D9 client area, by clicking on the "My Services" tab, and then the blue "i" icon next to your hosting package.
When you have entered the information, click on "Connect".
When you've connected, you'll notice that some of the empty windows have been populated. The image below shows you what all of the different windows are, we've colour coded each window for you to simplify things.
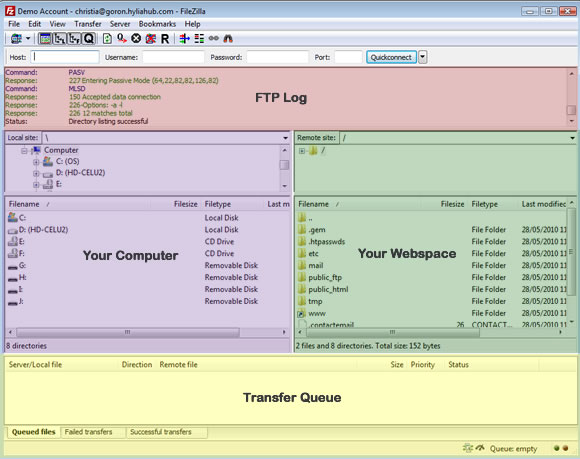
What we need to concentrate on 1st is the left hand window, which is purple in the above diagram. This allows us to navigate through all of the files on our computer. So we need to find our website files, in this example, I've got the files that I want to upload in a folder called "My Website", and they are located on my desktop.
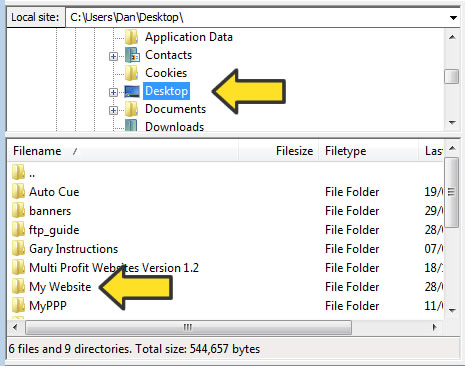
First of all, in the upper window of the local site box (your computer), locate and click on the Desktop - or whichever folder your files are stored in.
When we've clicked on the Desktop in the upper window, you can see that the folders stored on my Desktop are all listed in the lower window. My files that make up my website are located in the "My Website" folder, so all we need to do is double click on it to open it up.
You'll then be able to see the files and folders that need to be uploaded.
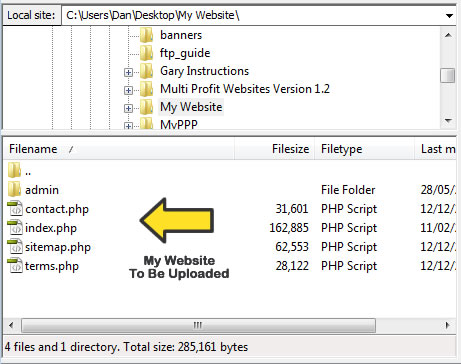
The next step is to upload them to your webspace, but it's important to upload the files to the correct directory.
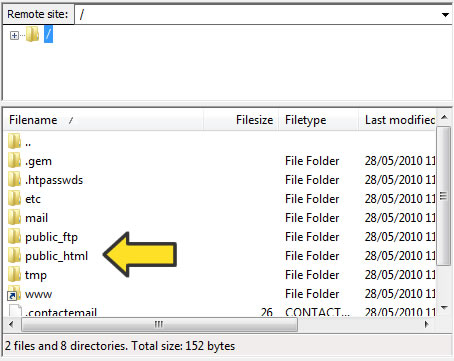
If you are uploading the files to your Primary Domain, then the files need to be uploaded to the "public_html" directory. If you look over to the right hand widow (green in the colour coded diagram), you'll be able to see the public_html directory, double click on it to go inside it.
If you are uploading to an addon domain, please refer to the following guide:
A Beginners Guide To FTP - Uploading To An Addon Domain
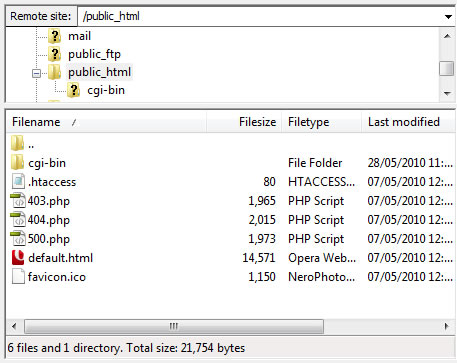
You'll then be able to see some files that have been pre-loaded to your site, this is just the default D9 Hosting holding page (default.html), and some customer error pages (403.php, 404.php and 500.php), these are normal so don't let them put you off!
We are now ready to upload our files!
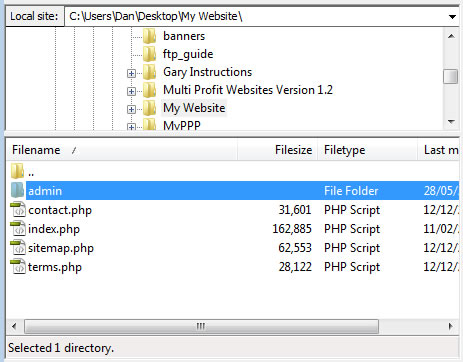
Go back to the left hand window, and click on the 1st file or folder in the list, please ensure you DON'T click on yellow folder with two dots next to it, this shouldn't be uploaded.
In my example, the 1st file/folder is the admin folder, so I've left clicked on it to select it.
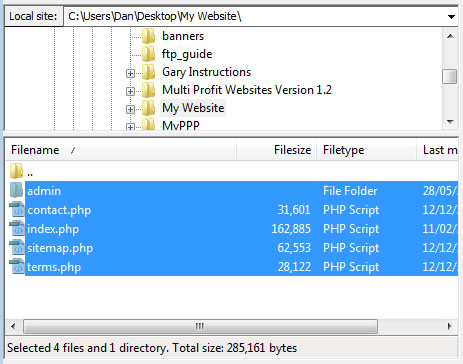
With the 1st file/folder select, hold the shify key on your keyboard and click on the bottom file/folder. This will allow you to select all the files in one go rather than selecting them individually.
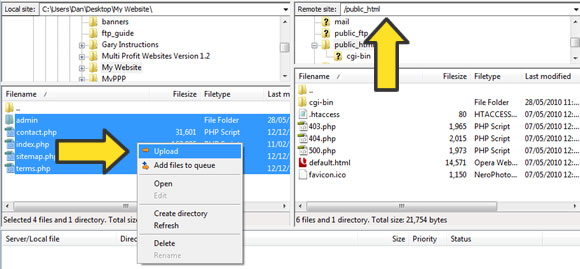
The final step is to move the files over to the webspace. Remember that it's vital that you upload the files for your primary domain to your public_html directory. You can check that you are in the public_html directory before uploading, by looking at the path in the "Remote Site" window as shown in the screen shot below.
When you've confirmed the files are going to be uploaded to the public_html directory, you can either hold the left key on your mouse and drag the files over from the left hand window (your computer), to the right hand window (your webspace), or, you can do what is being shown in the image below, and you can simply right click in the blue area and click on "Upload".
When you click on Upload, you'll notice that there's some activity in the bottom window, this is the file transfer queue, and it lets you see all of the files that are being uploaded. If you are a lot of files to upload the transfer could take some time, so if you leave it running and then come back to it when the transfers are complete.
If, after completing, there are some files in the "Failed Transfers" tab, you can right click on them and select "Re-Queue" to place them back into the transfer queue to be re-uploaded.

A Beginners Guide To FTP - Uploading To Your Primary Domain Print
- 60

