Wordpress staging is available to all our Shared, Reseller and Multi Site hosting customers, as well as VPS and Dedicated Server clients with an active Softaculous license.
Wordpress staging allows you to create a copy of your live website which you can then make changes to without it affecting the live website. When you are happy with the changes you can then push the staging website to "live".
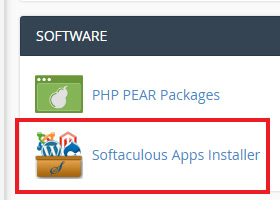
To get started, log into your cPanel account and click on the "Softaculous Apps Installer" icon.
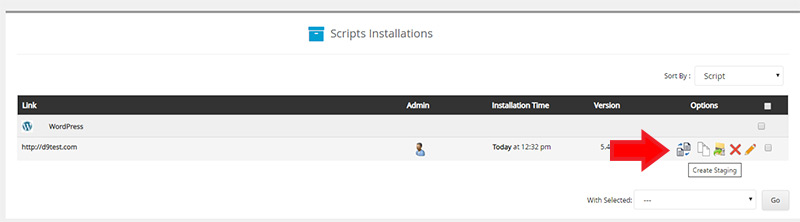
The next step is to bring up the list of current Wordpress installations. To do this, click on the "All installations" icon at the top right of the page.

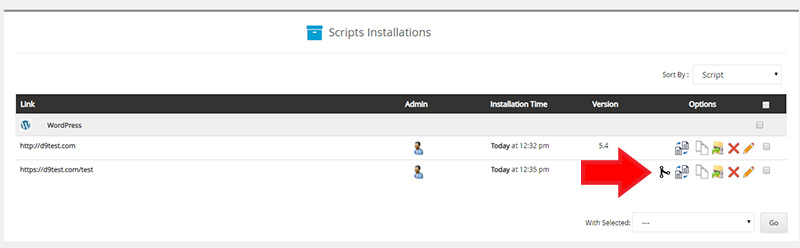
You will then be presented with a list of all script installations that you have installed using the Softaculous script installer. If you don't see your Wordpress installation in this list, please contact our technical support team and we should be able to import the installation into Softaculous for you.
To create a staging version of a Wordpress website click on the "create staging" icon.
You will then be presented with a screen asking you where you would like to create the new staging installation. This can be set to anything you like but we'd recommend setting it to a new directory that doesn't already exist. When you are happy with what you've entered click on the "Create Staging" button at the bottom of the page.
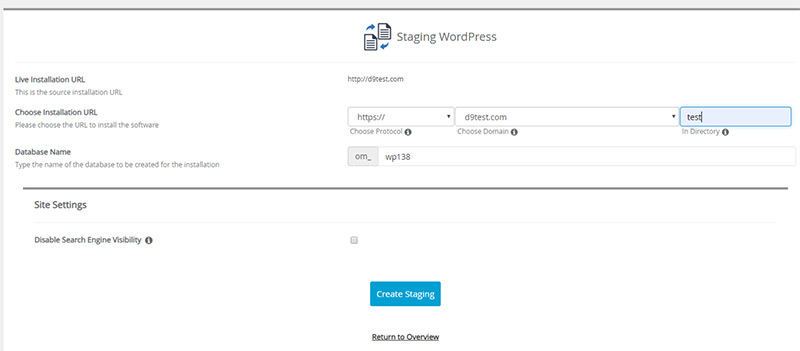
Your new Wordpress staging installation will then be created. If you are creating a staging of a large website please be patient, as it may take some time to set up. When the staging installation has been successfully set up you can log into the staging site and make your changes.
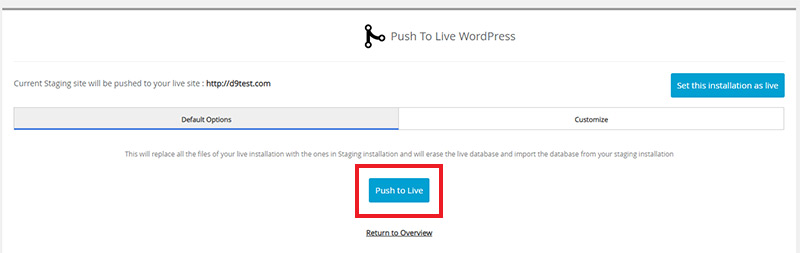
When you have finished working on the website, head back to the "All installations" page in Softaculous and you'll be able to see the live installation of the website as well as the staging version. Click on the "Push to live" icon next to your staging installation.
You will then be presented with a confirmation screen. Usually you don't need to make any changes on this page but if you wish you can click on the "Customize" tab to make a number of changes before pushing the site live.
When you are happy with your selections click on the "Push to Live" button to replace the current live website with the staging installation.